Installing Docker on Windows
For Windows 10/11 Pro, Enterprise, or Education
Enable Hyper-V and Containers
Open PowerShell as Administrator and run:
Enable-WindowsOptionalFeature -Online -FeatureName Microsoft-Hyper-V -All
Enable-WindowsOptionalFeature -Online -FeatureName Containers -All
Restart your computer when prompted.
Download Docker Desktop
Go to docs.docker.com/desktop/setup/install/windows and download the stable release.
Run the installer
Double-click Docker Desktop Installer.exe
Keep Use WSL 2 instead of Hyper‑V checked (recommended)
Click OK and let the installation finish.
Restart your computer when asked.
For Windows 10/11 Home
Windows Home doesn’t include Hyper‑V, so you’ll use WSL 2 (Windows Subsystem for Linux).
Enable WSL
PowerShell as Admin:
dism.exe /online /enable-feature /featurename:Microsoft-Windows-Subsystem-Linux /all /norestart
dism.exe /online /enable-feature /featurename:VirtualMachinePlatform /all /norestart
Restart your PC.
Set WSL 2 as default
wsl --set-default-version 2Install a Linux kernel update
Download and run from:
aka.ms/wsl2kernel
Install Docker Desktop
Same installer as above – Docker will automatically use WSL 2.
Post-installation on Windows
Launch Docker Desktop from the Start menu. You’ll see the whale icon in the system tray (it should turn green). Open a Command Prompt or PowerShell and test:
docker --version
docker run hello-world
Installing Docker on macOS
For Intel (x86_64) and Apple Silicon (M1/M2/M3)
Download Docker Desktop
From docs.docker.com/desktop/setup/install/mac – choose the correct chip version.
Install
Open the downloaded .dmg file
Drag the Docker icon into the Applications folder.
Launch Docker
Go to Applications → Docker
You’ll see a permission prompt – enter your macOS password.
The whale icon appears in the menu bar. Wait until it says “Docker Desktop is running”.
Verification
Open Terminal and run:
docker --version
docker run hello-world
Note for Apple Silicon users: Some older images may not have ARM64 builds. Docker Desktop includes Rosetta 2 emulation for x86 containers – enable it in Settings → General → Use Rosetta for x86/AMD64 emulation.
Installing Docker on Linux
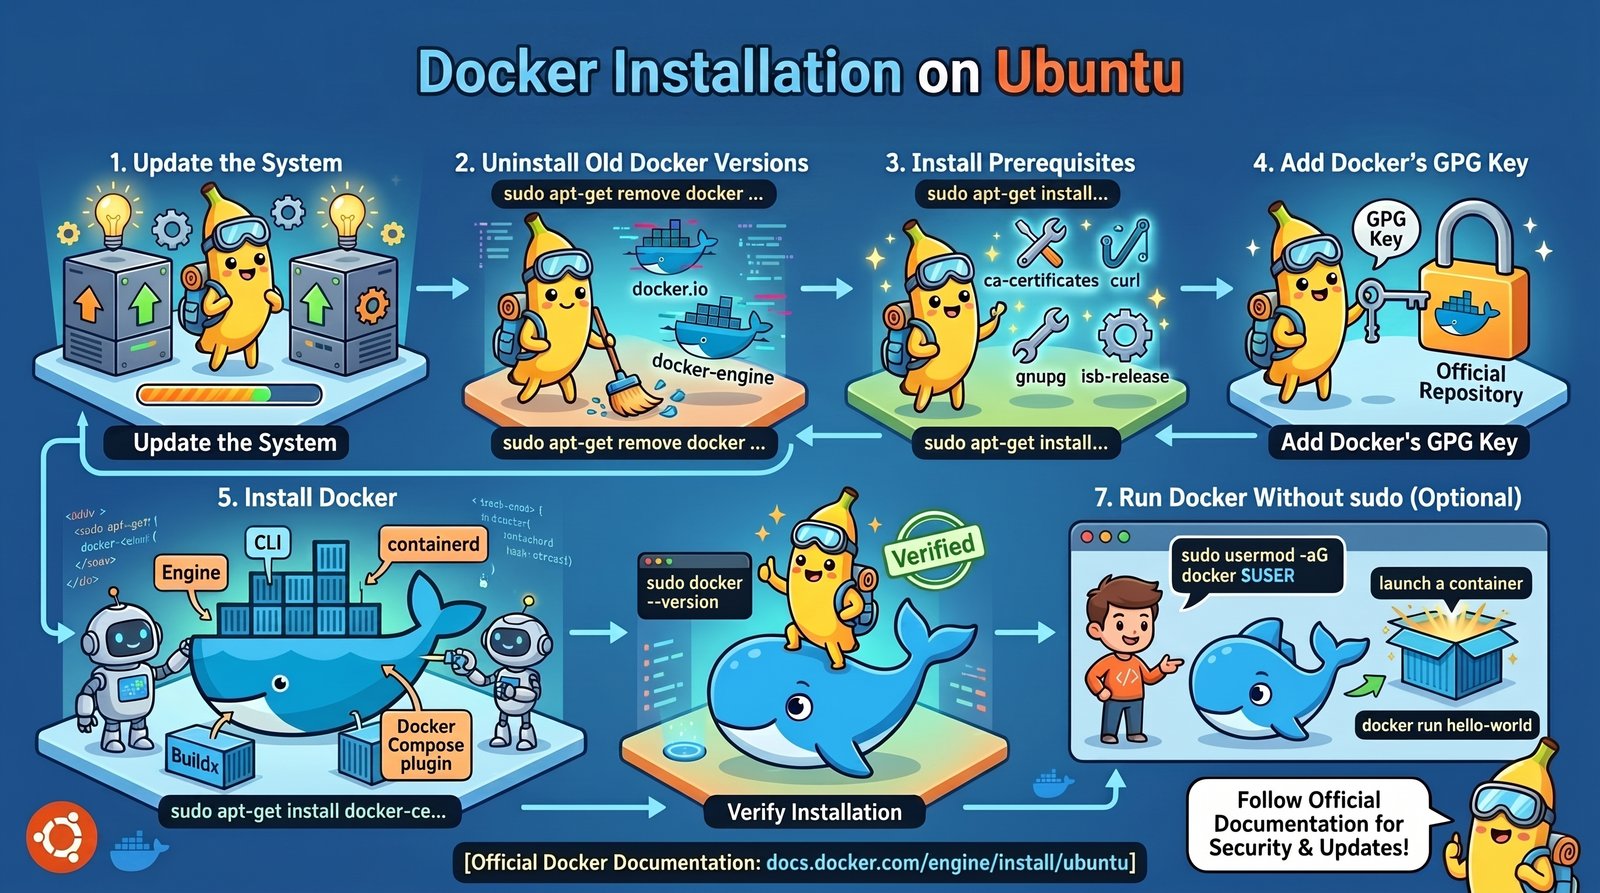
Ubuntu / Debian (Recommended method using Docker’s repo)
# Update your package index
sudo apt update

# Install prerequisites
sudo apt install -y ca-certificates curl

# Add Docker’s official GPG key
sudo install -m 0755 -d /etc/apt/keyrings
sudo curl -fsSL https://download.docker.com/linux/ubuntu/gpg -o /etc/apt/keyrings/docker.asc
sudo chmod a+r /etc/apt/keyrings/docker.asc

# Add the repository
echo "deb [arch=$(dpkg --print-architecture) signed-by=/etc/apt/keyrings/docker.asc] https://download.docker.com/linux/ubuntu $(. /etc/os-release && echo "$VERSION_CODENAME") stable" | sudo tee /etc/apt/sources.list.d/docker.list > /dev/null

# Install Docker Engine
sudo apt update
sudo apt install -y docker-ce docker-ce-cli containerd.io docker-buildx-plugin docker-compose-plugin
RHEL / CentOS / Fedora
# Remove older versions if any
sudo yum remove docker docker-client docker-client-latest docker-common docker-latest docker-latest-logrotate docker-logrotate docker-engine

# Install prerequisites
sudo yum install -y yum-utils

# Add Docker repository
sudo yum-config-manager --add-repo https://download.docker.com/linux/centos/docker-ce.repo

# Install Docker Engine
sudo yum install -y docker-ce docker-ce-cli containerd.io docker-buildx-plugin docker-compose-plugin

# Start Docker
sudo systemctl start docker
sudo systemctl enable docker   # auto-start on boot
Post-installation Linux Steps (Important!)
By default, Docker commands require sudo. To run Docker as a non‑root user:
# Create the docker group (it may already exist)
sudo groupadd docker

# Add your user to the docker group
sudo usermod -aG docker $USER

# Log out and back in (or run: newgrp docker)
After re‑logging in, test:
docker run hello-world
Verifying Docker on Linux
docker --version
docker run --rm hello-world
sudo systemctl status docker   # check the daemon status
Installing Docker Engine Only (No Desktop)
If you’re on a server or don’t want the GUI, you can install just the Docker Engine on Linux. For Windows Server, Microsoft provides Docker EE (Enterprise Edition). For macOS without GUI, consider using colima or lima – but Docker Desktop is the standard.
Common Installation Issues and Fixes
| Problem | Solution |
|---|---|
| “Docker Desktop requires Hyper-V” (Windows) | Enable Hyper-V as shown above, or use WSL 2 on Windows Home. |
| “Cannot connect to the Docker daemon” (Linux) | Start the daemon: sudo systemctl start docker (or add user to docker group and reboot). |
| Permission denied for /var/run/docker.sock (Linux) | Run sudo usermod -aG docker $USER and log out/in. |
| Docker Desktop won’t start on macOS | Check that no other virtualization software (VirtualBox, VMWare) is conflicting. |
| “Insufficient disk space” | Docker stores images in ~/.docker or C:\Users\ |
Quick Install Using Convenience Scripts (Linux Only – Use with Care)
Docker provides a convenience script for testing/staging environments:
curl -fsSL https://get.docker.com -o get-docker.sh
sudo sh get-docker.sh
⚠️ Do not use this script in production – it assumes default configurations and may update packages without your control.
Uninstalling Docker (If Needed)
Windows
Settings → Apps → Docker Desktop → Uninstall
Also remove %USERPROFILE%\.docker and %PROGRAMDATA%\Docker
macOS
Move Docker.app to Trash
Delete ~/.docker, ~/Library/Containers/com.docker.docker, and ~/Library/Group Containers/group.com.docker
Linux (Ubuntu/Debian)
sudo apt purge docker-ce docker-ce-cli containerd.io
sudo rm -rf /var/lib/docker
sudo rm -rf /var/lib/containerd
What’s Next After Installing Docker?
Now that Docker is installed, you can: